
Setting Up Prime Exclusive Discounts to Increase Your Sales Conversion
Are you looking for more ways to increase your sales conversion? This blog post might just be the answer to your question. Amazon recently rolled out their Prime Exclusive Discounts promotion for sellers with Prime-eligible products sold through FBA. These discounts are exclusively for Amazon Prime subscribers and can be offered not only on Prime Day but all year long. Pretty neat isn’t it?

In order to set up Prime Exclusive Discounts, your products must meet the following criteria:
- Must be in new condition
- Must be Fulfilled by Amazon
- Have at least a 3-star rating or no ratings
- The discount must be 10% — 80% off of your listed price. For a Prime Day discount, it must be 20% — 80% off your listed price
- Discount must beat the lowest price in the past 30 days
- Not a restricted or offensive product
I have put together a 3-step guide for you to leverage on the Prime Exclusive Discounts promotion. The promotion can be seen in the advertising tab of your Seller Central account. You can login to your Seller Central HERE.
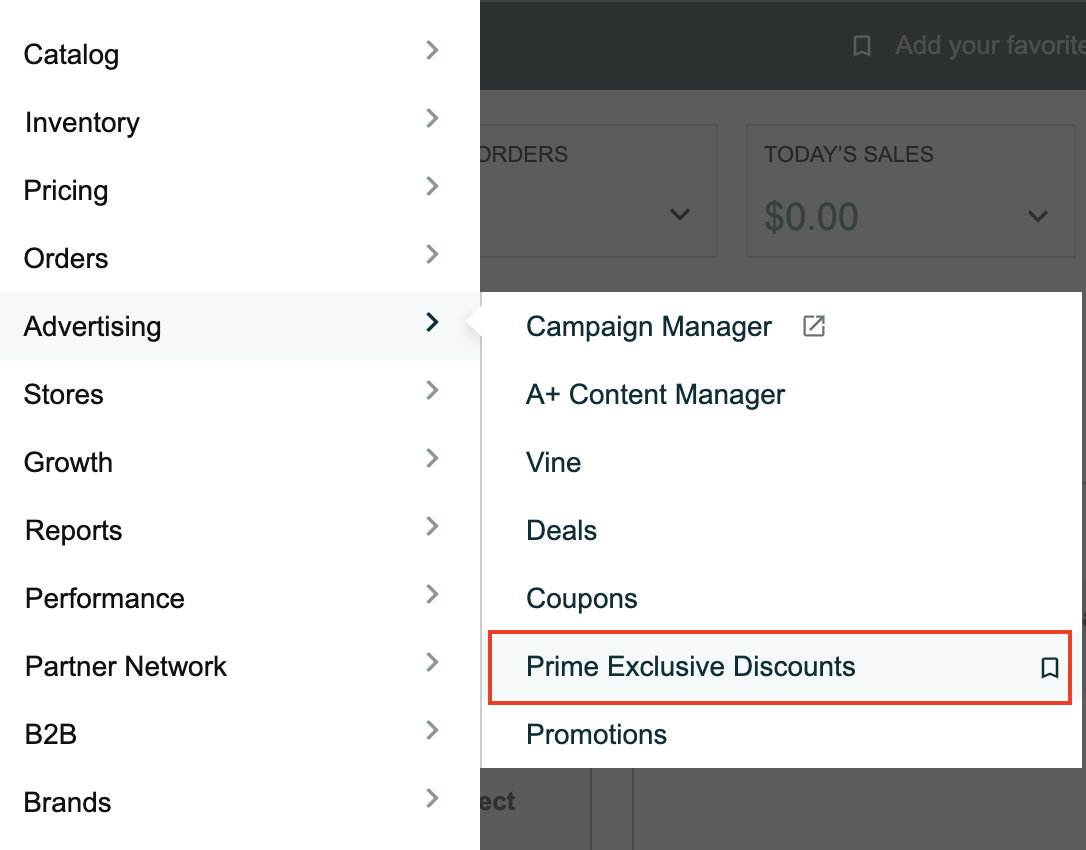
Step 1 — Enter Discount Details

Once you click on the “Create Discount” button, the next step is to enter all necessary discount details.
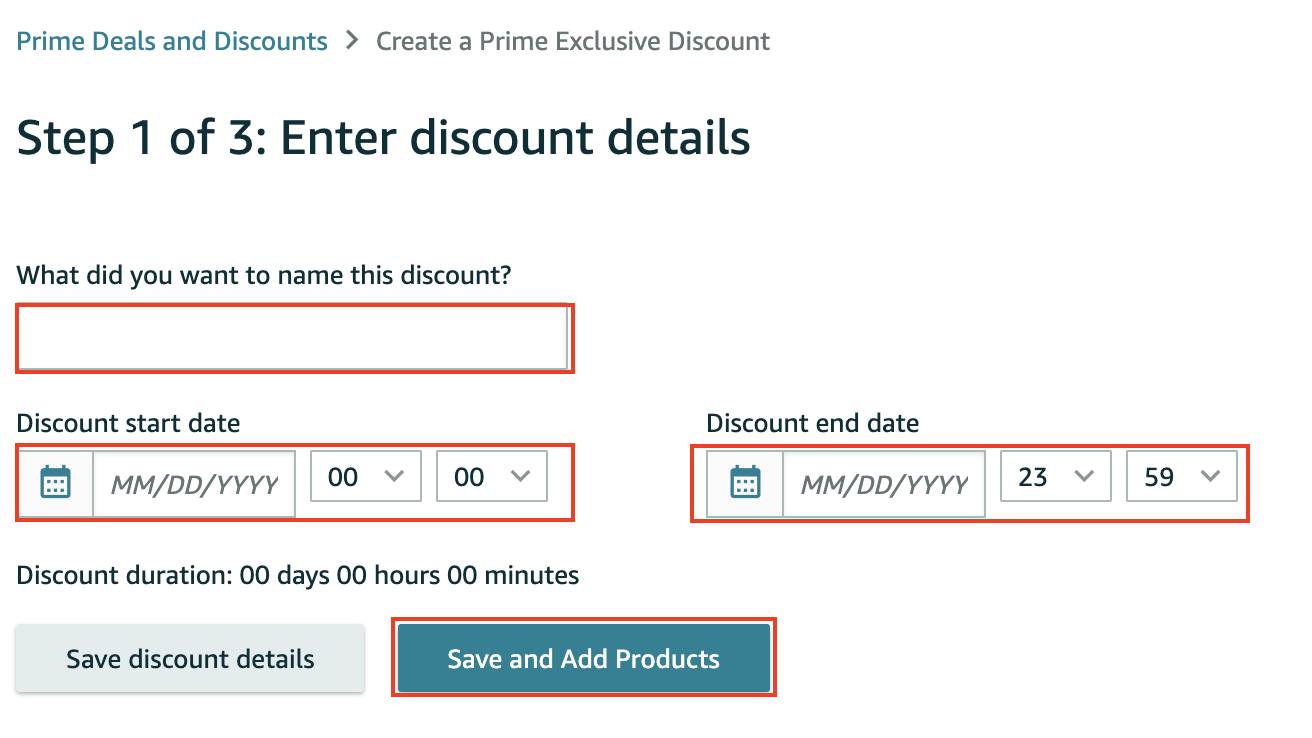
- Discount Title — Be as specific as possible when naming your discount so you don’t waste time trying to figure out your product discounts. This is simple, but you would be surprised how many sellers don’t do this.
- Discount Dates — You need to enter the duration of the discount. I highly suggest running these discounts periodically. For instance, you can run discounts on special occasions such as Back to School or Brand Anniversary.
Step 2 — Enter / Upload Product Details for Your Product
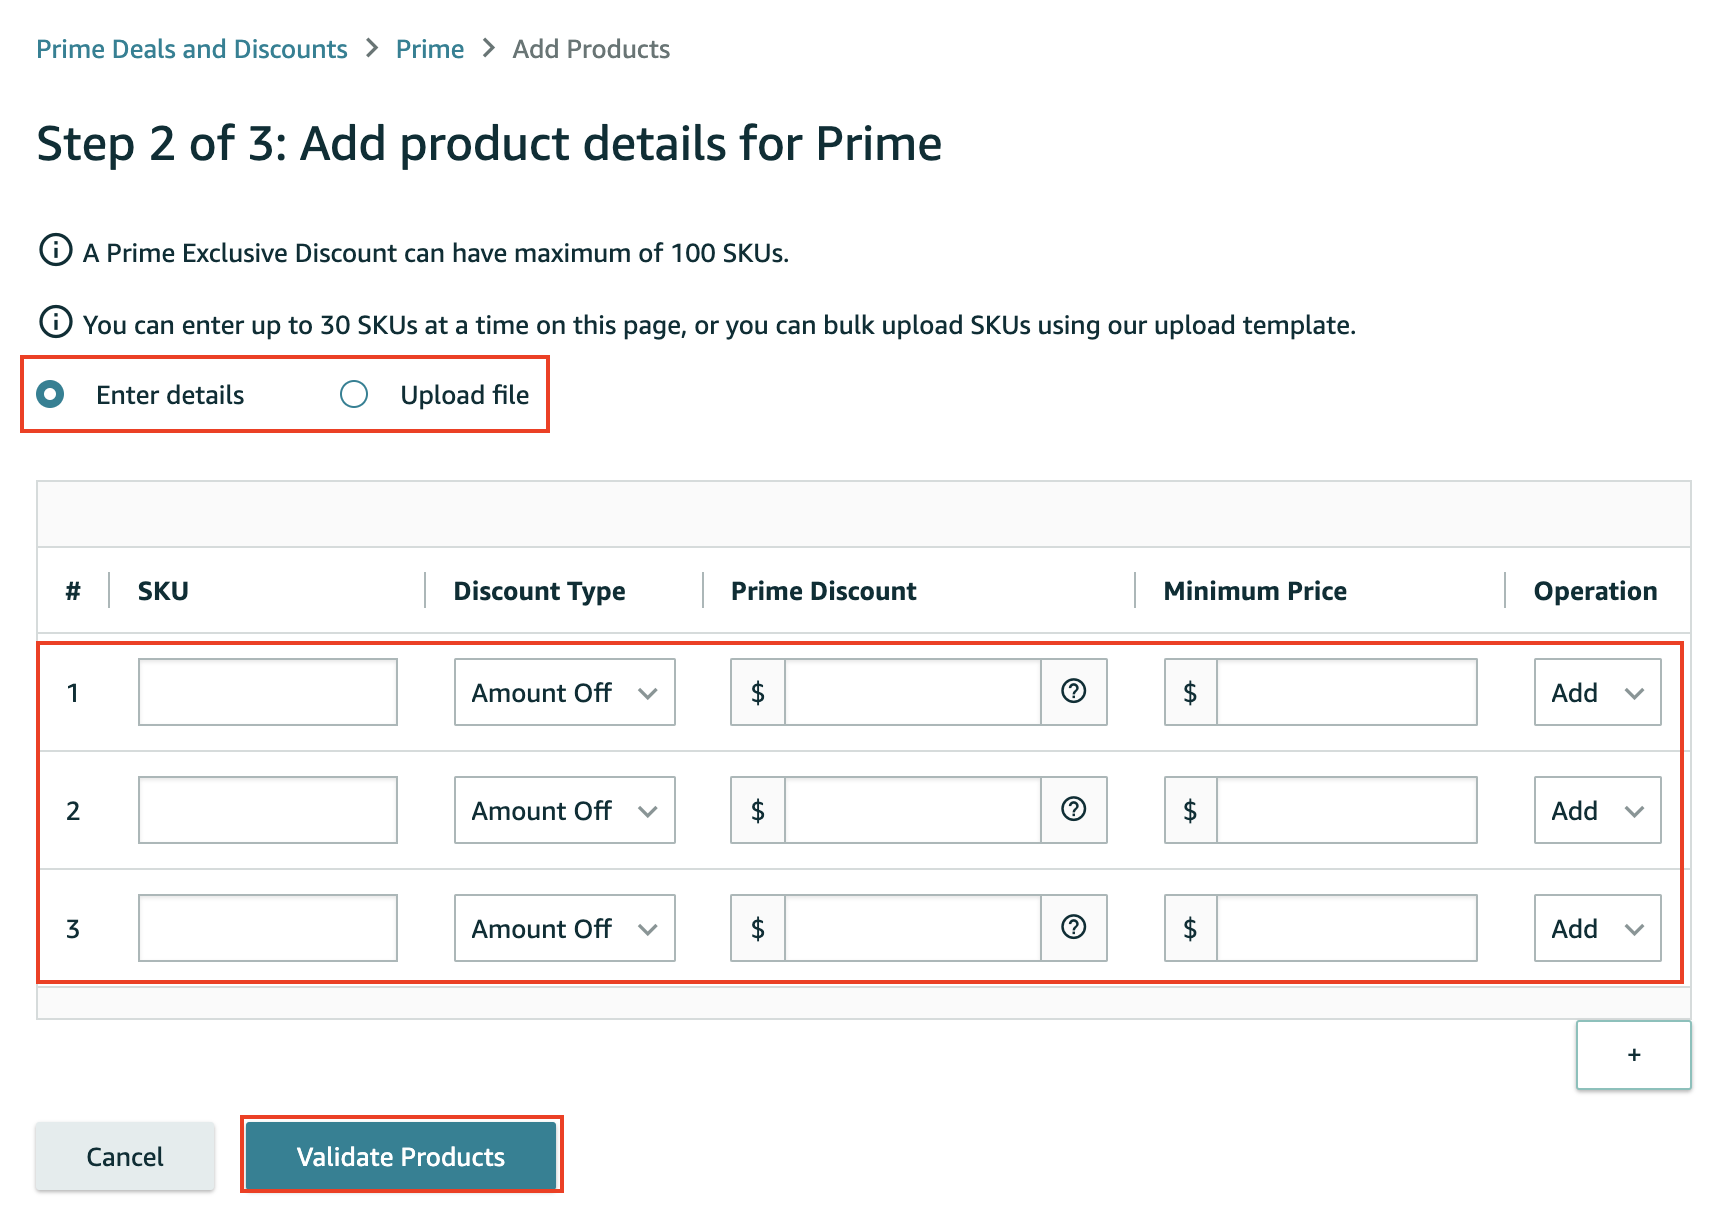
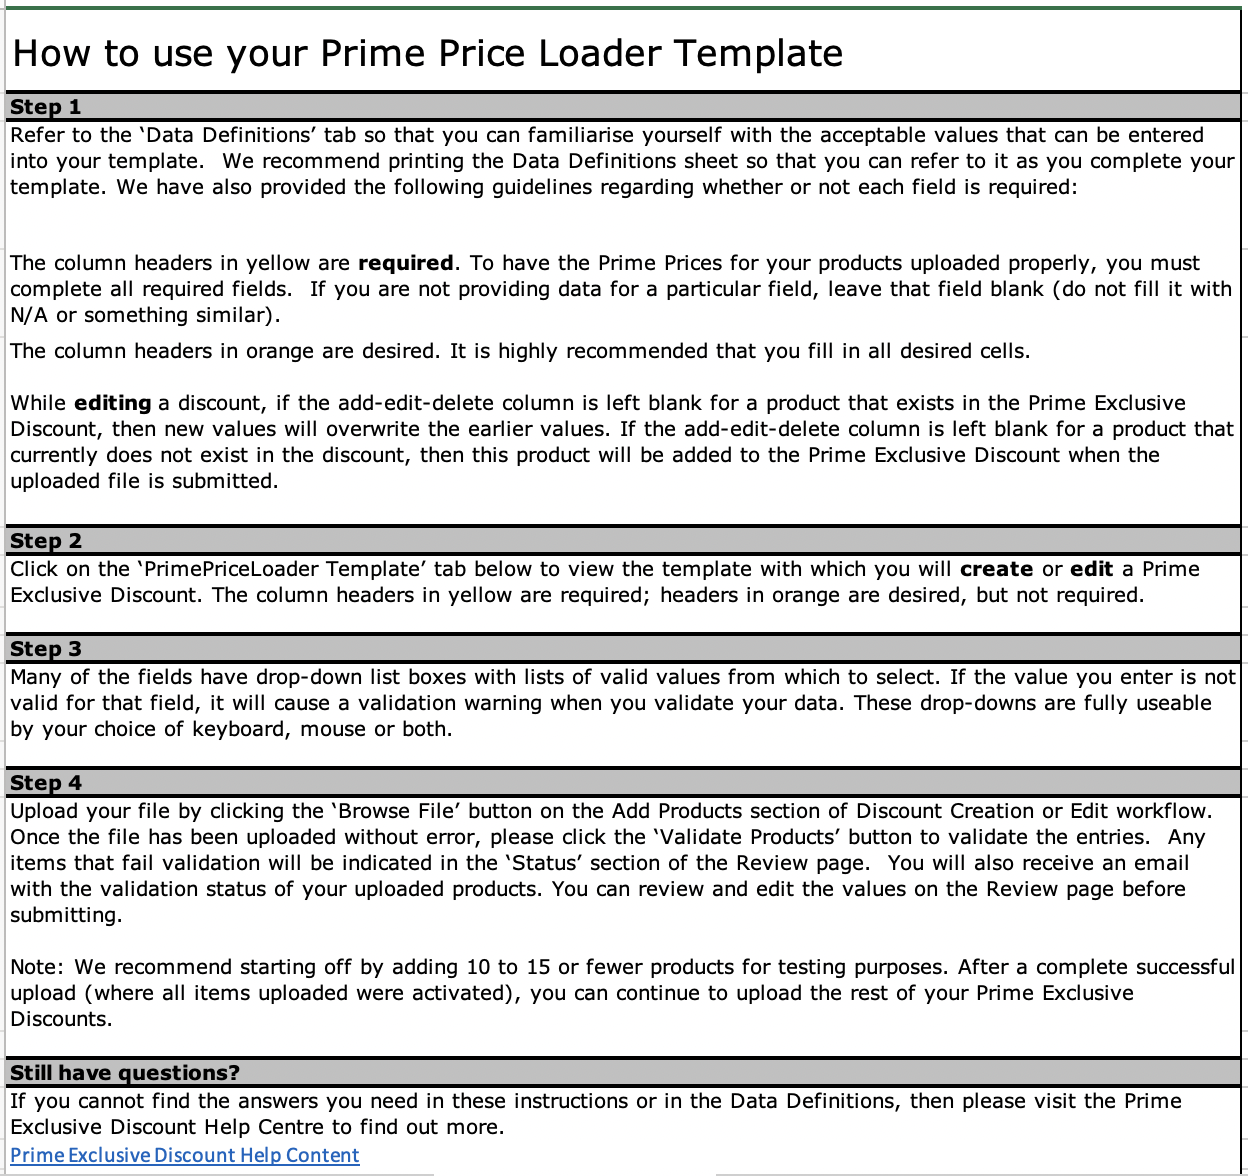
- You need to either enter or upload your product details for the discount and Amazon allows a maximum of 100 SKUs per upload. You will need to download the template by clicking on the “View upload template” button and manually enter all required details.This might seem daunting at first but it is quite easy to set up. Just follow the simple instructions explained in this blog post and you won’t have any issues setting up your discounts. The template contains 3 tabs:
- Instructions — There is a 5-step instruction detail on how to use the Prime Price Loader template. Please read through it for complete understanding.
2. Data Definitions — This tab contains specific instructions on what details you need to enter into each field.
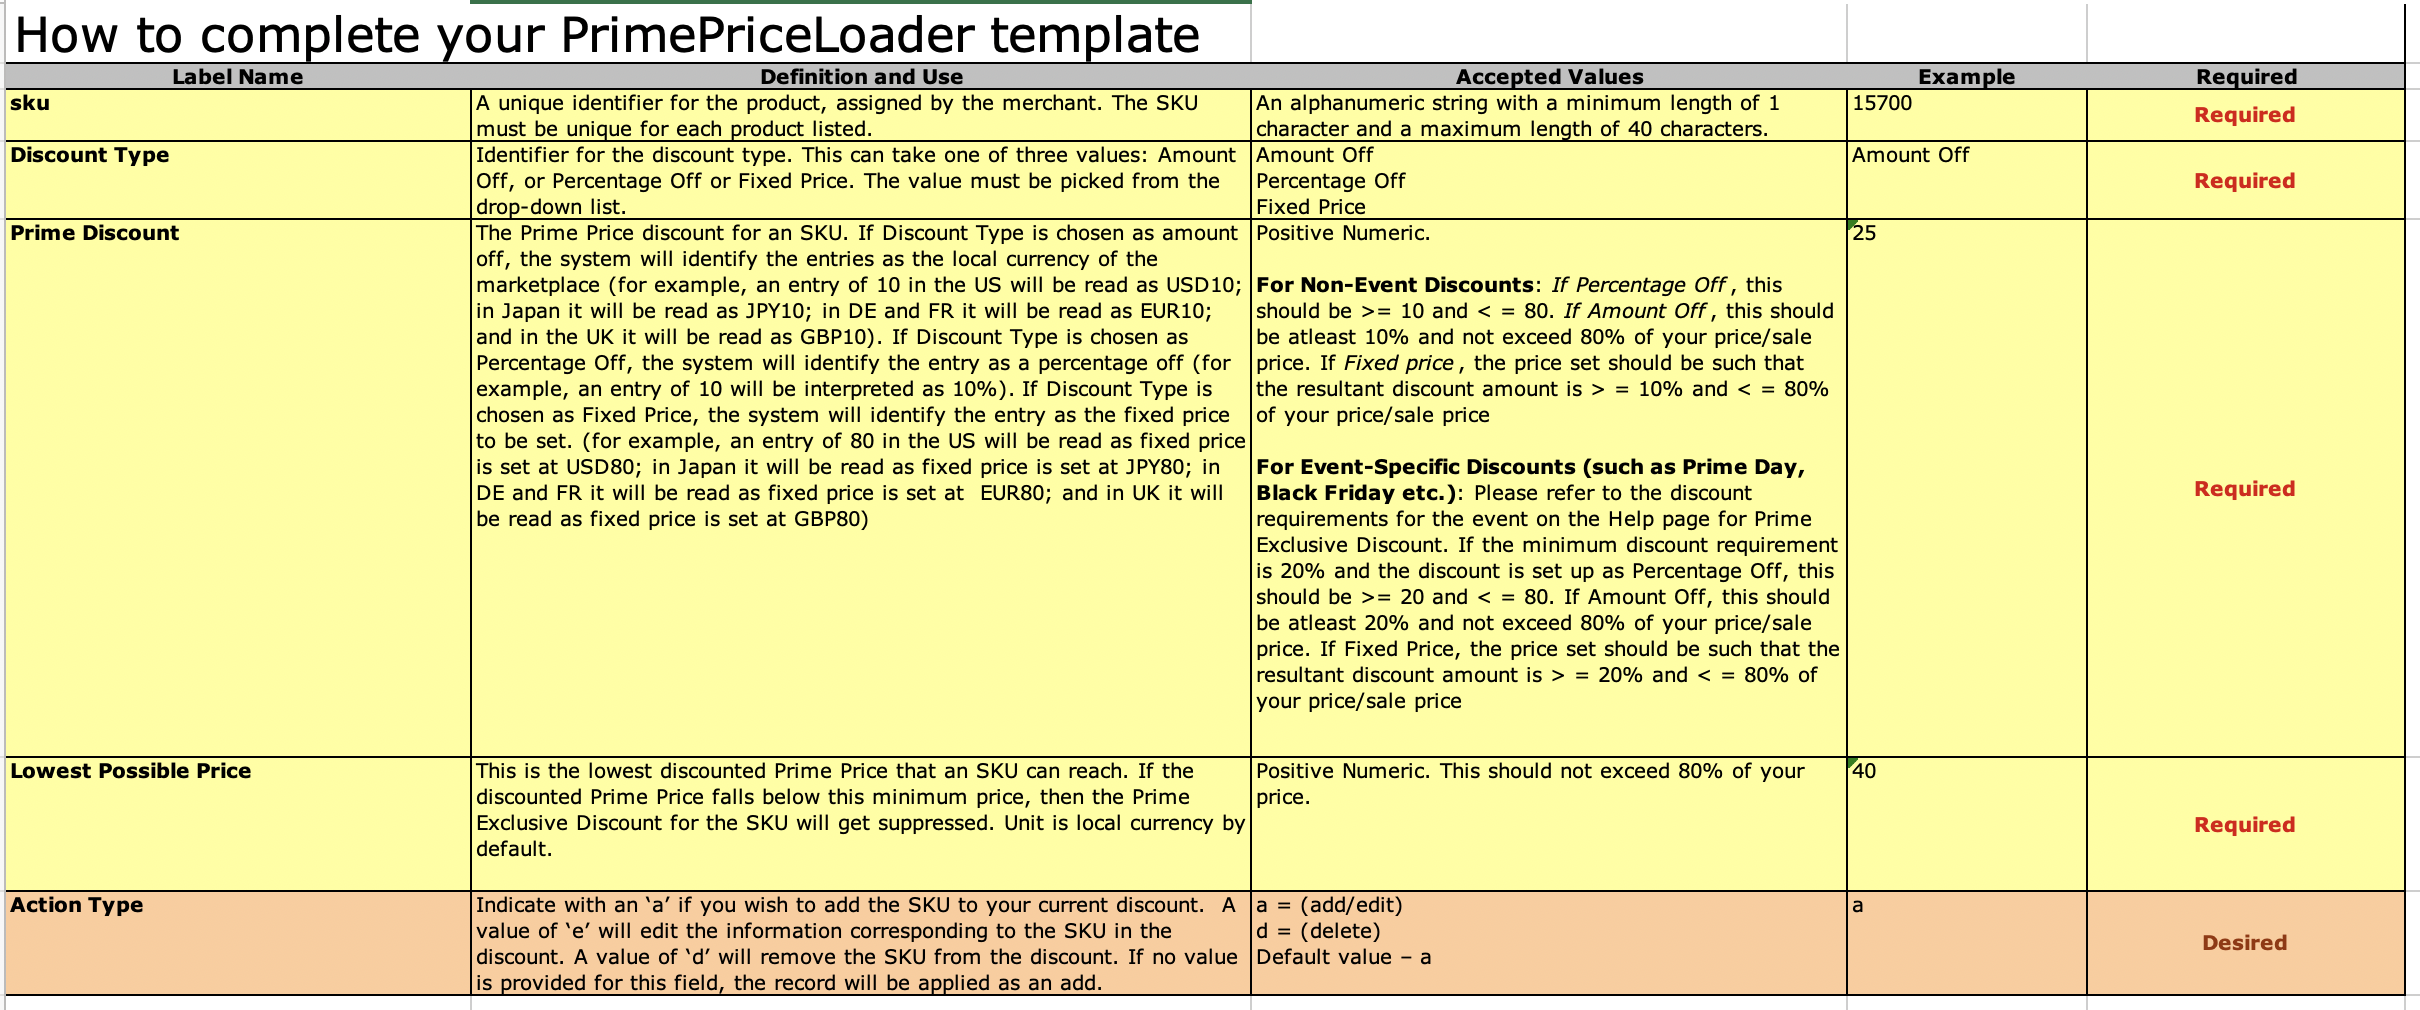
3. PrimePriceLoader Template — Enter your SKU number, discount type (amount or percentage off), price discount, minimum discounted Prime price, and the action picked from a dropdown menu (add, edit, or delete the SKU).

Step 3 — Review Your Discounts

Once you have uploaded the template, you can review all entered details in this third and final step before submitting it for approval. You can edit the incorrect details here should there be any errors instead of having to upload the template again.
Pro Tip: Keep in mind that Prime Exclusive Discounts overlap with other deals. You need to make sure that you don’t schedule discounts during this period so customers don’t combine these deals for significant discounts.

Once you have ensured all discount information is correct and that there are no other deals LIVE during that period, click the “OK” button to submit your discount.
Final Thoughts
There are many types of deals you can include in your strategy to increase sales conversion and this is only one of them. You now know how to set up your own Prime Exclusive Discounts, what do you think of this type of promotion? Will you be incorporating them in your sales strategy? Feel free to share your thoughts with us.
For any further questions regarding expanding your eCommerce business from Taiwan to the US, EU, UK, AUS, or Japan marketplaces, you can reach us by filling in the contact form.
